Concrete Garage Floor Preparation Methods That Improve Epoxy Coating Adhesion and Long Term Durability
Introduction
Most epoxy garage floors do not fail because the epoxy was poor. They peel, bubble, and lift under hot tyres because the concrete underneath was smooth, dirty, damp, or sealed. Epoxy cannot grip a surface it cannot bite into, and it cannot stay bonded to oil, dust, or moisture vapour pushing up from below. Preparation is therefore not a preliminary chore. It is the job. The coating is only the visible finish on top of it.
Good preparation does three things: it removes everything that would block a bond, it opens the surface so epoxy can soak in and lock on, and it deals with cracks and moisture before they are trapped under an impermeable film. A two-car garage takes a full day of prep, sometimes two. The methods below follow the order professionals use.
Assessing the Concrete Surface
Start empty and in good light. Sweep the floor, move everything out, and look at the slab as a whole before any single stain. You are deciding how old and hard the concrete is, and what has been done to it before.
Checks That Decide Your Method
- Water drop test: drip water in several places. If it soaks in within a minute and darkens the concrete, the pores are open. If it beads, a sealer, curing compound, or oil is present and must be ground off.
- Scratch test: drag a screwdriver or coin across the surface. Soft, powdery concrete that scratches easily may need a densifier or a different system, not standard epoxy.
- Previous coatings: look for paint, thin sealers, and patches of old epoxy, especially along walls and under where cars parked. All of it has to come off; new epoxy will only be as strong as the weakest old layer.
- Age and condition: new concrete needs at least 28 days to cure before coating. Note efflorescence, the white powdery salt that signals moisture moving through the slab.
Also check the control joints, the saw cuts dividing the slab. Decide now whether to leave them open, fill them flush, or fill them after coating.
Degreasing and Chemical Cleaning
Clean before you grind. Grinding a greasy floor does not remove oil; it heats it, spreads it, and drives it deeper into the pores, where it later pushes the coating off in dark, fish-eyed patches. Years of engine oil, transmission fluid, and tyre marks need chemistry first.
Work in sections of about 100 square feet. Scrub a strong alkaline degreaser or trisodium phosphate substitute into the stain with a stiff brush or a floor scrubber, keep it wet for 15 to 20 minutes, then rinse thoroughly. A typical two-car garage uses $30 to $60 of degreaser, and bad oil spots often need two or three passes. Test with water again: it should sheet and soak in evenly, not bead over the old stain.
- Use a wet vacuum to pick up dirty rinse water instead of hosing it into the joints, where it adds unwanted moisture.
- For deep oil that keeps wicking back up, apply a poultice degreaser, cover it with plastic overnight, and let it draw oil out rather than scrubbing it in.
- Never use a silicone-based cleaner or tyre shine near the floor before coating. Silicone contamination is almost impossible to remove and causes cratering.
Grinding Versus Etching
Epoxy needs a surface profile, a controlled roughness often compared to 80- to 120-grit sandpaper and described as a concrete surface profile of CSP 2 to 3. Without it, even clean concrete is too smooth, especially the hard, steel-trowelled slabs in most garages. You create that profile either mechanically or chemically.
Diamond Grinding
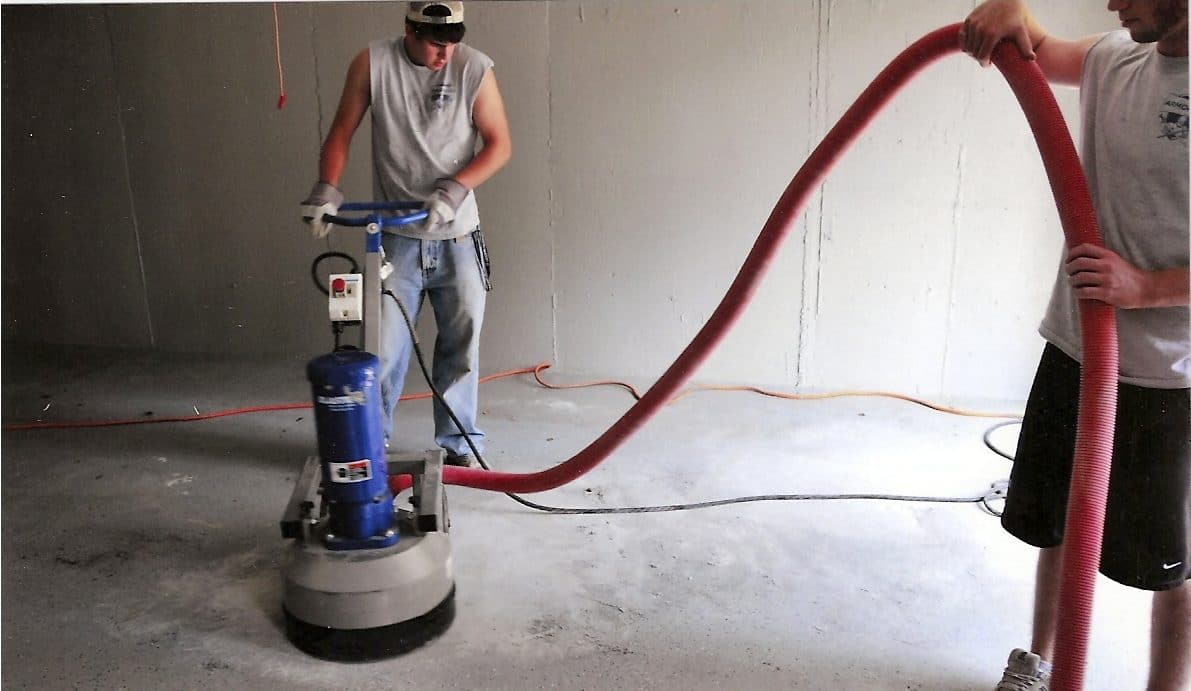
A walk-behind diamond grinder fitted with 30- or 40-grit metal-bond segments removes sealers, old paint, and the weak top layer while leaving an even profile. It is the reliable option for hard concrete, previously coated floors, and any slab that failed the water drop test. Renting a grinder with a vacuum costs about $250 to $450 per day. The vacuum matters: grinding without dust control coats everything in fine, hazardous dust and leaves a layer that itself weakens adhesion.
Acid or Gel Etching
Etching uses muriatic acid or, more safely, a citric or phosphoric gel etch to dissolve a thin layer of cement and roughen the surface. A kit costs $50 to $100 and needs no heavy equipment. Its limits are real, though. Etching does not remove sealer, paint, or oil, it works unevenly on hard-trowelled concrete, and it can leave a floor rough in one bay and glassy in the next. If you etch, neutralise as directed, rinse several times, and check the profile everywhere, not just in one corner.
For most homeowners, the honest rule is simple: rent the grinder if the floor is sealed, coated, hard, or large. Etch only a clean, unsealed, softer slab, and be prepared to grind any areas that stay smooth.
Crack and Spall Repair
Epoxy is thin. It will not hide damage; it will outline it. Every crack, chip, and spall, where the surface has flaked away around aggregate or rusting steel, needs repair after profiling, when the damage is fully visible and the pores are open.
Open hairline cracks slightly with a crack-chasing blade or angle grinder so filler can get in, vacuum out the dust, and fill with a fast-setting epoxy or polyurea crack filler, typically $25 to $50 per cartridge. Overfill slightly, let it cure fully, then grind it flush. Filler ground too early smears; filler left proud shows as a ridge through the finish. For spalls and pitted areas, use a patching compound matched to the depth, feather the edges, and grind smooth once cured.
- Do not fill moving control joints with rigid filler. Use a flexible joint sealant after coating, or the slab movement will crack the epoxy in a straight line.
- Fill pop-outs and bolt holes from old shelving; they become small craters that collect dirt in the finished floor.
Moisture Testing
Concrete looks dry long before it is dry enough. Moisture vapour rising through the slab pushes against the underside of an epoxy film and causes blisters, cloudiness, and sheets of coating lifting away. This is the most common cause of failure in ground-level garages with no vapour barrier under the slab.
The simple screening test is the plastic sheet test: tape a 2-by-2-foot square of clear plastic tightly to the floor for 24 hours. Condensation underneath, or a darkened patch of concrete, means moisture is present. For a number you can compare with your product’s limit, use a calcium chloride test kit, about $10 to $15 per test, or a concrete moisture meter. Most standard epoxies require a moisture vapour emission rate below 3 to 5 pounds per 1,000 square feet in 24 hours, or an in-slab relative humidity below 75 to 80 percent.
If your floor tests high, do not proceed on hope. Use a moisture-mitigation primer rated for higher humidity, wait for a drier season, or improve drainage around the garage. Coating over a wet slab almost guarantees doing the job twice.
Primer and Adhesion Promoters
Primer is not diluted epoxy and it is not optional on porous concrete. A penetrating epoxy primer wets the opened pores, binds remaining microscopic dust that vacuuming cannot lift, and gives the main coat a chemically compatible surface to bond to. On a porous, well-ground floor it also stops outgassing, the pinholes and bubbles that appear as air escapes from the slab while the coating cures.
Choose the primer for the slab you actually have: a standard penetrating primer on dry, profiled concrete, a moisture-tolerant primer where tests are borderline but within its rating, or a bonding primer for hard, dense concrete. Apply it thin, at the label spread rate, often 250 to 350 square feet per gallon. Puddled primer can cure glossy and become its own weak layer. Respect the recoat window, commonly 12 to 24 hours: coat too soon and solvents are trapped; leave it too long and you must sand and clean again.
A Step-by-Step Prep Sequence
Working in order prevents contaminating a floor you have already profiled, and coating before the last check is done.
- Day one, morning: empty the garage, sweep, and complete the water, scratch, and coating checks. Mark oil stains, cracks, and smooth areas with chalk.
- Day one, midday: degrease section by section, rinse, wet-vacuum, and set fans running. Repeat on any stain where water still beads.
- Day one or two: grind or etch the dry floor, working to the edges with a hand grinder. Vacuum continuously and again thoroughly afterwards.
- After profiling: chase and fill cracks, repair spalls, and grind all repairs flush once fully cured.
- Final checks: run the moisture test, confirm the profile and water absorption are even across the whole floor, and tape off walls and the driveway edge.
- Coating day: vacuum once more, wipe with a tack cloth or denatured alcohol if the system allows, mix the primer, and coat within its stated temperature range, usually 50 to 90 degrees Fahrenheit.
Final Thoughts
A durable epoxy floor is built before the first tin is opened. Assess honestly, clean before you profile, grind when the slab needs it, repair damage flush, test for moisture, and prime for the concrete you have. Together these steps cost less than stripping a peeling floor. Spend the time on preparation, and the coating becomes the easy part.
Frequently Asked Questions
How long should preparation take for a two-car garage?
Plan on one full day for cleaning, grinding, and repairs, plus drying time. Most homeowners spread the work over a weekend and coat on the second or third day.
Can I coat over an existing clear sealer?
Not reliably. Epoxy bonds to the sealer, not the concrete, and lifts when the sealer lets go. Test with water; if it beads, grind the sealer off completely before priming.
Is etching enough on a brand-new garage floor?
Sometimes, if the concrete is unsealed, clean, and not hard-trowelled. New slabs still need 28 days to cure, and any smooth or sealed areas that fail the water test should be ground instead.
How do I control dust while grinding?
Rent a grinder with a shroud and an industrial vacuum, seal the door into the house with plastic and tape, and wear a properly fitted respirator. Vacuum the floor several times afterwards rather than sweeping, which puts dust back into the air and onto the surface.
What if my old epoxy is peeling in only a few places?
Remove all of it. Sound-looking old epoxy around a peeling patch is usually bonded no better; it has not been stressed yet. Grind back to bare, profiled concrete, then prime and recoat the whole floor.